
Changing Your Site Design
When you first create a new website, you don't always know which design is right for you, or you may later find that a bold, more suitable template has just appeared in the collection. With this update, you no longer need to contemplate on the right design, as you can easily switch it even after you edit and publish your website. Here’s how:
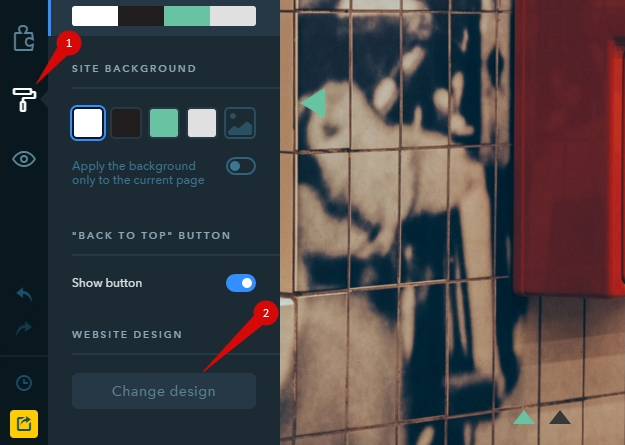
- 1. From the left menu choose the “Design” tab.
- 2. Click “Change design”.
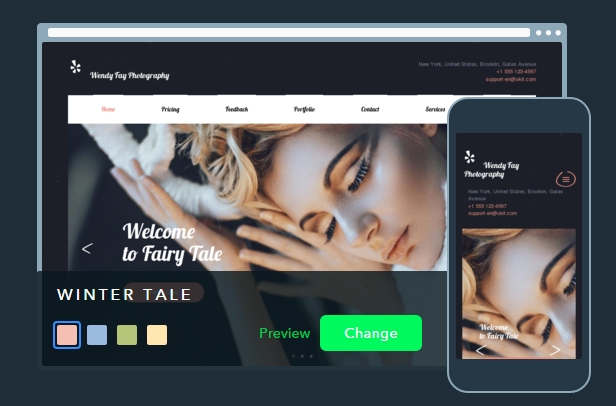
The “Change design” button will take you to the familiar Wizard interface where you can choose a new design. Once you select one, all the content from your previous template will be automatically transferred to it with all the settings preserved.
Note: Images from your old template that have been set by default as the background for Blocks, in the Slider, Cards, or other places are your old design’s content. That means if you don’t change them, they’ll be taken to your new design. In other words, be sure to check that the default pictures from the former “Pastry Shop” template don’t travel to the new “Auto Service” design.
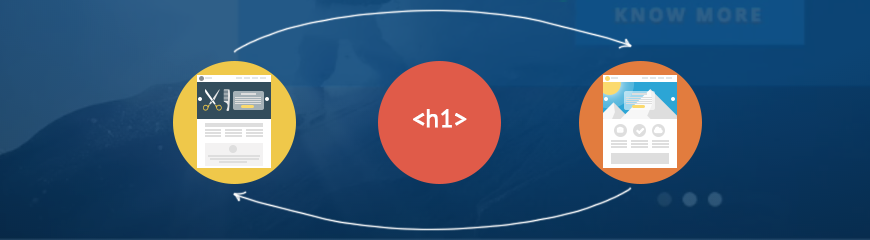
Fine-Tuning SEO Settings for Headings
For our advanced users who are familiar with HTML tags and the role they play in the onsite optimization we keep introducing a number of additional settings.
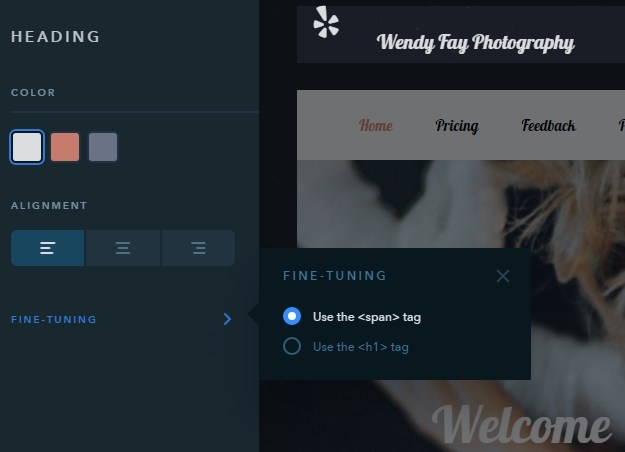
This time they concern the headings. By default, they all are hooked in the < span > element, but when working on the page structure you might as well want to use the heading with the < h1 > tag, which can be enabled in just one click.
If you are only beginning to learn things about SEO and don’t know much about these tags, it’s better to skip this section so far. Having more than one < h1 > tag per page has its consequences for it is the main heading that must contain only the key set of words describing the page.
We have more updates and improvements on the way, with many of them being based on your suggestions. So, feel free to tell us what features you would like to see on your website and we’ll add them!
Your comment