

Note: To apply this feature, you have to upgrade your plan to Pro.
Do you remember that, many years ago, a snowfall effect was on the top of the list of website effects? Today, it’s a relic of the past as hundreds of other more complex effects were created. This article is about one of them.
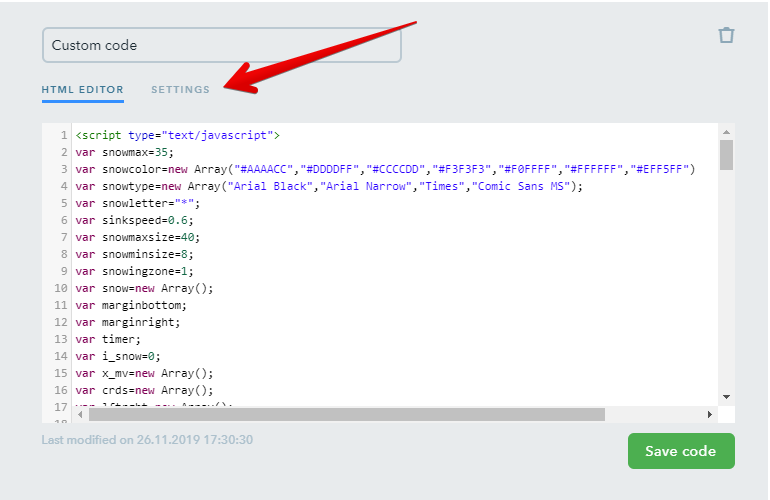
By the way, if you prefer old-school tricks and do want to have those snowflakes on your website, you can see a cross-browser code below that won’t overload your site since it doesn’t require images:
<script type="text/javascript">

var snowmax=35;

var snowcolor=new Array("#AAAACC","#DDDDFF","#CCCCDD","#F3F3F3","#F0FFFF","#FFFFFF","#EFF5FF")

var snowtype=new Array("Arial Black","Arial Narrow","Times","Comic Sans MS");

var snowletter="*";

var sinkspeed=0.6;

var snowmaxsize=40;

var snowminsize=8;

var snowingzone=1;

var snow=new Array();

var marginbottom;

var marginright;

var timer;

var i_snow=0;

var x_mv=new Array();

var crds=new Array();

var lftrght=new Array();

var browserinfos=navigator.userAgent;

var ie5=document.all&&document.getElementById&&!browserinfos.match(/Opera/);

var ns6=document.getElementById&&!document.all;

var opera=browserinfos.match(/Opera/);

var browserok=ie5||ns6||opera;

function randommaker(range) {

    rand=Math.floor(range*Math.random());

    return rand;

}

function initsnow() {

    if (ie5 || opera) {

        marginbottom=document.body.clientHeight;

        marginright=document.body.clientWidth;

    }

    else if (ns6) {

        marginbottom=window.innerHeight;

        marginright=window.innerWidth;

    }

    var snowsizerange=snowmaxsize-snowminsize;

    for (i=0;i<=snowmax;i++) {

        crds[i]=0;

        lftrght[i]=Math.random()*15;

        x_mv[i]=0.03+Math.random()/10;

        snow[i]=document.getElementById("s"+i);

        snow[i].style.fontFamily=snowtype[randommaker(snowtype/length)];

        snow[i].size=randommaker(snowsizerange)+snowminsize;

        snow[i].style.fontSize=snow[i].size+"px";

        snow[i].style.color=snowcolor[randommaker(snowcolor.length)];

        snow[i].sink=sinkspeed*snow[i].size/5;

        if (snowingzone==1) {snow[i].posx=randommaker(marginright-snow[i].size)}

        if (snowingzone==2) {snow[i].posx=randommaker(marginright/2-snow[i].size)}

        if (snowingzone==3) {snow[i].posx=randommaker(marginright/2-snow[i].size)+marginright/4}

        if (snowingzone==4) {snow[i].posx=randommaker(marginright/2-snow[i].size)+marginright/2}

        snow[i].posy=randommaker(2*marginbottom-marginbottom-2*snow[i].size);

        snow[i].style.left=snow[i].posx+"px";

        snow[i].style.top=snow[i].posy+"px";

    }

    movesnow();

}

function movesnow() {

    for(i=0;i<=snowmax;i++) {

        crds[i]+=x_mv[i];

        snow[i].posy+=snow[i].sink;

        snow[i].style.left=snow[i].posx+lftrght[i]*Math.sin(crds[i])+"px";

        snow[i].style.top=snow[i].posy+"px";

        if (snow[i].posy>=marginbottom-2*snow[i].size || parseInt(snow[i].style.left)>(marginright-3*lftrght[i])) {

            if (snowingzone==1) {snow[i].posx=randommaker(marginright-snow[i].size)}

            if (snowingzone==2) {snow[i].posx=randommaker(marginright/2-snow[i].size)}

            if (snowingzone==3) {snow[i].posx=randommaker(marginright/2-snow[i].size)+marginright/4}

            if (snowingzone==4) {snow[i].posx=randommaker(marginright/2-snow[i].size)+marginright/2}

            snow[i].posy=0;

        }

    }

    var timer=setTimeout("movesnow()",50);

}

for (i=0;i<=snowmax;i++) {

    document.write("<span id='s"+i+"' style='position:absolute;top:-"+snowmaxsize+"px;'>"+snowletter+"</span>");

}

if (browserok) {

    window.onload=initsnow;

}

</script>
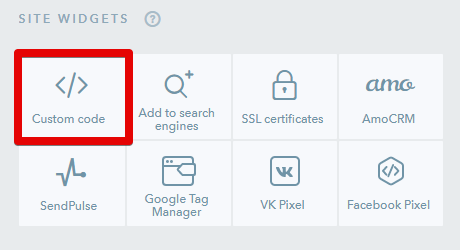
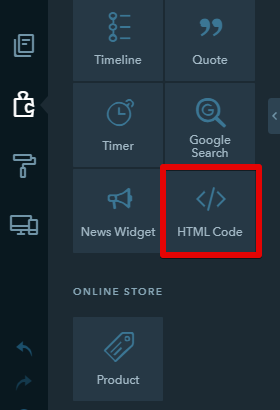
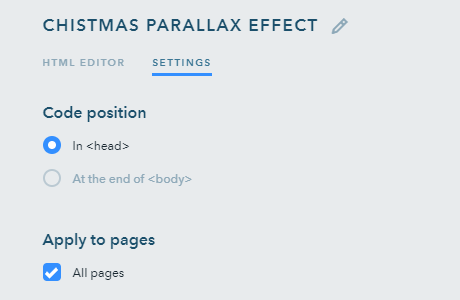
To install the script, click on Custom code on the Dashboard:
How to Add a Block with the Parallax Effect to Your Website
No doubt, you’ve seen many websites with a background image that follows the mouse. This is the effect we want to teach you, and this will take no more than 10 min!
Go to the Builder mode and add a fluid block to the desired place on the page.

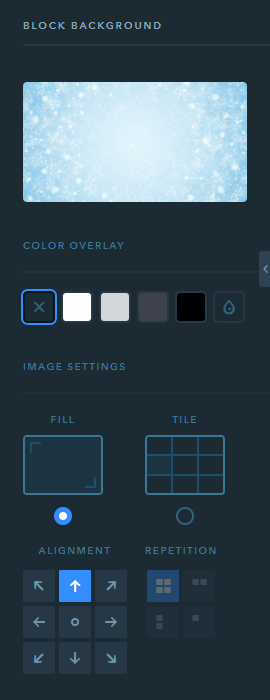
Set up this or any other image for the block background. The image must be stretched to the width of the screen.
The only widget to apply to this block is HTML Code:
After adding the widget to the block, paste the code below:
<div id="parallax">
<div class="forest">
    <div data-offset="80" class="snowflakes parallax"></div>
    <div data-offset="40" class="snowflakesback parallax"></div>
    <div data-offset="50" class="trees parallax"></div>
    <div data-offset="30" class="treesback parallax"></div>
    <div class="snow"></div>
    <div class="ground"></div>
</div>
</div>
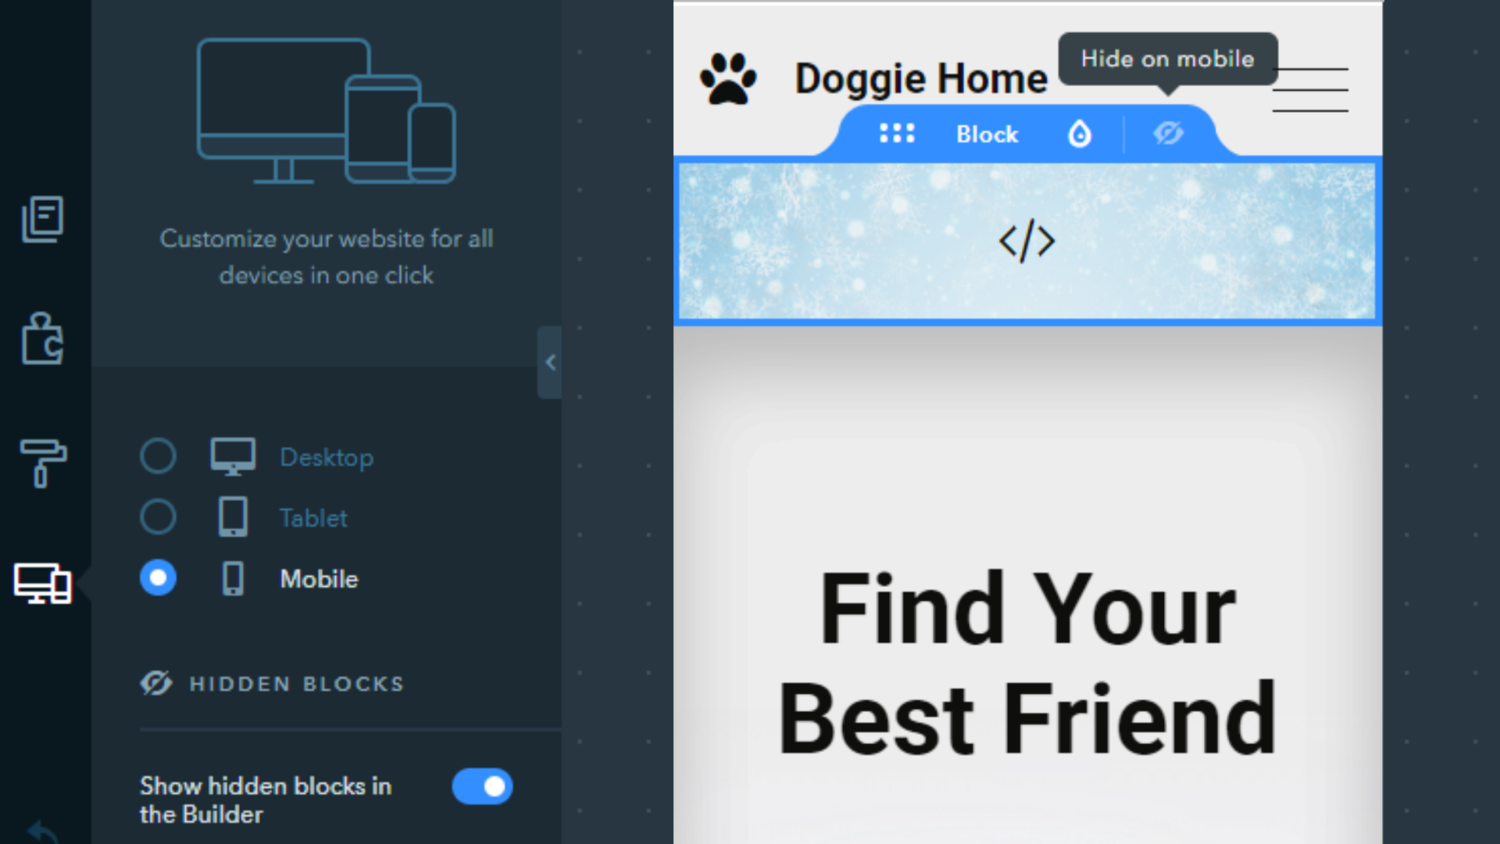
Note: A block with parallax effect isn’t adapted for mobile devices, so it’s better to hide it. Go to the Adaptive site version mode, select Mobile and click on the Hide on mobile icon in the block.
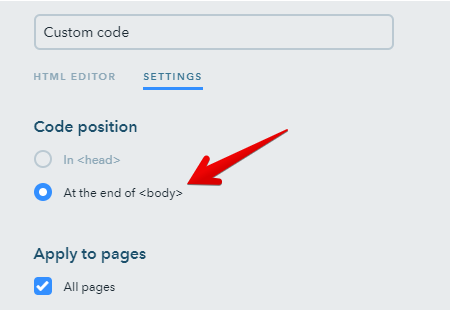
Go back to the Dashboard and click on Custom code and add two codes:
<script type="text/javascript" src="https://code.jquery.com/jquery-1.9.1.js"></script>

<style>

#parallax {

    background:none;

    overflow:hidden;

}


.forest {

    bottom:0;

    right:0;

    left:0;

    height:450px;

    overflow:hidden;

}


.forest > div {

    position:absolute;

    bottom:0;

}


.ground {

    width:100%;

    height:80px;

    background:#FFF;

    z-index:999;

}


.forest div.snow {

    width:1400px;

    height:37px;

    left:50%;

    bottom:70px;

    margin-left:-710px;

    background:url(http://new-year-2020.ukit.me/uploads/s/u/0/g/u0gacdgkhpih/img/full_iUJEUkuR.png) no-repeat center;

    z-index:999;

}


.forest div.snowflakes {

    width:1400px;

    height:350px;

    left:50%;

    top:5px;

    margin-left:-710px;

    background:url(http://new-year-2020.ukit.me/uploads/s/u/0/g/u0gacdgkhpih/img/full_s6m03cOZ.png) no-repeat center;

    z-index:999;

}


.forest div.snowflakesback {

    width:1400px;

    height:350px;

    left:50%;

    top:1px;

    margin-left:-710px;

    background:url(http://new-year-2020.ukit.me/uploads/s/u/0/g/u0gacdgkhpih/img/full_3R4HwYWR.png) no-repeat center;

    z-index:1;

}


.forest div.trees {

    width:763px;

    height:285px;

    left:50%;

    margin-left:-398px;

    background:url(http://new-year-2020.ukit.me/uploads/s/u/0/g/u0gacdgkhpih/img/full_80XNCmr0.png) no-repeat center;

    z-index:100;

}


.forest div.treesback {

    width:763px;

    height:285px;

    left:50%;

    margin-left:-398px;

    background:url(http://new-year-2020.ukit.me/uploads/s/u/0/g/u0gacdgkhpih/img/full_mytchxKp.png) no-repeat center;

    z-index:2;

}

</style>

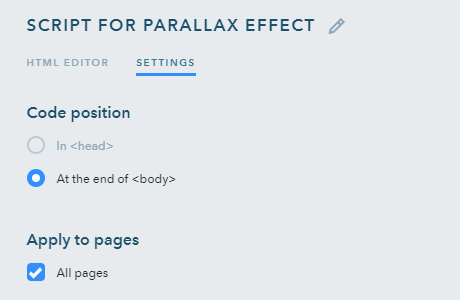
For the second code select the “At the end of <body>” option in the Settings:
<script type="text/javascript">

$(window).on('mousemove', function(e) {

    var wh = $(window).width();

    var ht = $(window).height();

    var offsetX = 0.5 - e.pageX / wh;

    var offsetY = 0.3 - e.pageY / ht;


    $(".parallax").each(function(i, el) {

        var offset = parseInt($(el).data('offset'));

        var translate = "translate3d(" + Math.round(offsetX * offset) + "px," + Math.round(offsetY * offset) + "px, 0px)";


        $(el).css({

            '-webkit-transform': translate,

            'transform': translate,

            'moz-transform': translate

        });

    });

});

</script>
Now, publish the website and enjoy the spectacular effect!
Image Archive
Though all the above mentioned steps are enough to make the parallax effect work, it’s better to apply images directly from your website. Download this image archive to your PC/laptop, upload them to your website image library, copy their URL and update their links in the first code snippet:
http://new-year-2020.ukit.me/.../img/full_iUJEUkuR.png – picture1.png
http://new-year-2020.ukit.me/.../img/full_s6m03cOZ.png – picture2.png
http://new-year-2020.ukit.me/.../img/full_3R4HwYWR.png – picture3.png
http://new-year-2020.ukit.me/.../img/full_80XNCmr0.png – picture4.png
http://new-year-2020.ukit.me/.../img/full_mytchxKp.png – picture5.png
Got questions? Leave them in the comments section below!